Migrating 50 or more private Repositories to GitHub Apps Guide
If your organization has more than 50 active repositories to migrate to our new GitHub Apps integration, you can use the travis_migrate_to_apps gem to migrate them in one sweep rather than adding them manually one by one in the GitHub UI.
Note that you can also choose “Activate all repositories” on GitHub to select all current and future repositories, so that you can activate them at Travis CI by adding a
.travis.ymlfile.
The following steps describe how to first authorize your account through GitHub Apps, get the required authentication tokens and use the the travis_migrate_to_apps gem to activate via GitHub Apps your private repositories:
1. Install the gem #
gem install travis_migrate_to_apps
2. Generate a GitHub personal access token with repo scope #
You can generate a new GitHub token here.
Choose the name of your liking and ensure to select the whole repo scope as shown below:

Then click the “Generate token” button at the bottom to generate the token.
You’ll then be back on the GitHub token page:

Take care of copying the newly generated token and save it for later usage.
Note: if you are migrating an organization, the token must be generated by an owner of the GitHub organization.
3. Activate the Travis CI GitHub Apps integration with 1 repo #
Go to your repositories page on travis-ci.com: https://travis-ci.com/account/repositories
Click the “Activate GitHub Apps Integration” button highlighted below:

You’ll directed to the GitHub Apps page for the Travis CI app:

Choose at least one repository and click the “Approve & Install” button.
You’ll then be redirected to your profile page on Travis CI and the newly added repository should appear under “GitHub Apps Integration”:

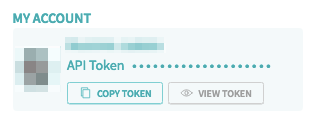
4. Get your Travis CI API token #
Here are the two ways you can get this token:
- On your profile page: https://travis-ci.com/profile

- Via the Travis CI client by running:
travis token --com
5. Run the gem #
travis_migrate_to_apps [owner_name] [travis_access_token] [github_access_token]
where
[owner_name]is the GitHub account (user or organization) where the repositories you want to migrate are located[travis_access_token]is the Travis CI token obtained in step #4 above[github_access_token]is the GitHub token obtained in step #2 above
6. Check the migration result #
You can now refresh your profile page on Travis CI and your newly migrated repositories should appear under the “GitHub Apps Integration” section.