Building with Custom Images
Travis CI empowers users to enhance standard Linux build environment images by creating customized build images. These images, identified uniquely, can significantly speed up regular builds by providing a tailored build environment.
As a Travis CI admin user, you have the control to view a list of all the customized images, review them, and remove any obsolete or unnecessary ones. This gives you a sense of security and control over your environment.
In this section, users can learn how to create and use Linux Customized Images, including associated billing charges.
Build a Custom Image #
Users can now create and store custom images, such as a Custom Linux Build Environment Image. By assigning a custom identifier, users can easily reference and use these images in subsequent .travis.yml files to run a build job using a custom build environment.
Custom images are supported for specific build infrastructures:
- Linux build environment.
Pre-requisites
To create a custom image, the user must comply with the following requisites:
- Active Travis CI account.
- The plan owner must have sufficient credits to run the build and to cover storage charges.
- Ensure the Storage add-on is activated.
- Custom names for custom images must have a unique name identifier.
To build a customized image, start with a .travis.yml file and add the following keys:
 vm:   #existing key
  create:
    name: my_custom_name #custom identifier string, human-readable
The build config validates the new nested key and string as values.
Next, install and set up all required dependencies in the build environment. The following example shows how to install dependencies and update the apt repository:
os: linux
dist: focal
vm:   #existing key
  create:
    name: my_custom_name #custom identifier string, human-readable
before_install:
  - sudo apt-get -y install libxml2-dev
addons:
  apt:
    update: true
And the following is an example for installing dependencies and updating the apt repository in a job matrix:
obs:
  include:
    - os: linux
      dist: focal
      vm:   #existing key
         create:
           name: my_custom_name #custom identifier string, human-readable
      before_install:
        - sudo apt-get -y install libxml2-dev
      addons:
        apt:
          update: true
    - os: linux
      dist: focal
      script:
        - # do some other stuff
Use a Custom Image #
After modifying the traditional .travis.yml file to reference a customized build environment image stored in Travis CI, users can use any custom build image to speed up regular build time.
Customized images created are stored in Travis CI, and users can download a custom Travis CI Linux build environment image to expedite the build process.
Custom build environment images are available only to users with direct permission to the repository and to any repository visible in the Travis CI user’s personal account repository list. This means users can trigger builds using the custom image of another personal account. Furthermore, the plan owner must have sufficient credits to run the build and to cover storage charges.
The process of using a custom image is as follows:
- The user creates a .travis.yml file with custom identifiers.
- The user triggers a build with a build job using a custom image based on the account and custom identifier, rather than the standard environment image.
- The Worker runs the build normally, using a specific custom image instead of the standard image provided by the job board.
- The build job runs using the selected custom image, and its log prints the custom image name.
Note: In concurrent jobs, if one job creates a custom image and the other job attempts to use it, the outcome may be an error.
A user can create up to three concurrent jobs, each with a different custom image. The only limitations are the user’s allowance and the credits available for excessive storage charges. The following are some example cases for building with custom images.
Use an existing custom image:
 lvm:   #existing key
  use: my_custom_name #custom identifier string, human-readable
 script:
   - # do other stuff
Use an existing custom image and create a new custom image out of it:
 vm:   #existing key
  use: my_custom_name #custom identifier string, human-readable
  create:
    name: my_custom_name_v2 #custom identifier string v2, human readable
before_install:
  - sudo apt-get -y install libxml2-dev
addons:
  apt:
    update: true
Create a custom image and use it in stages:
 jobs:
  include:
    - stage: create image
      os: linux
      dist: focal
      vm:   #existing key
         create:
           name: my_custom_name #custom identifier string, human-readable
      before_install:
        - sudo apt-get -y install libxml2-dev
      addons:
        apt:
          update: true
    - stage: use custom image
       vm:   #existing key
         use: my_custom_name #custom identifier string, human-readable
      script:
        - # do other stuff
Custom Images Tab #
In this tab, users with build trigger access can view and manage a list of all custom images created, view their data, and select which ones to use.
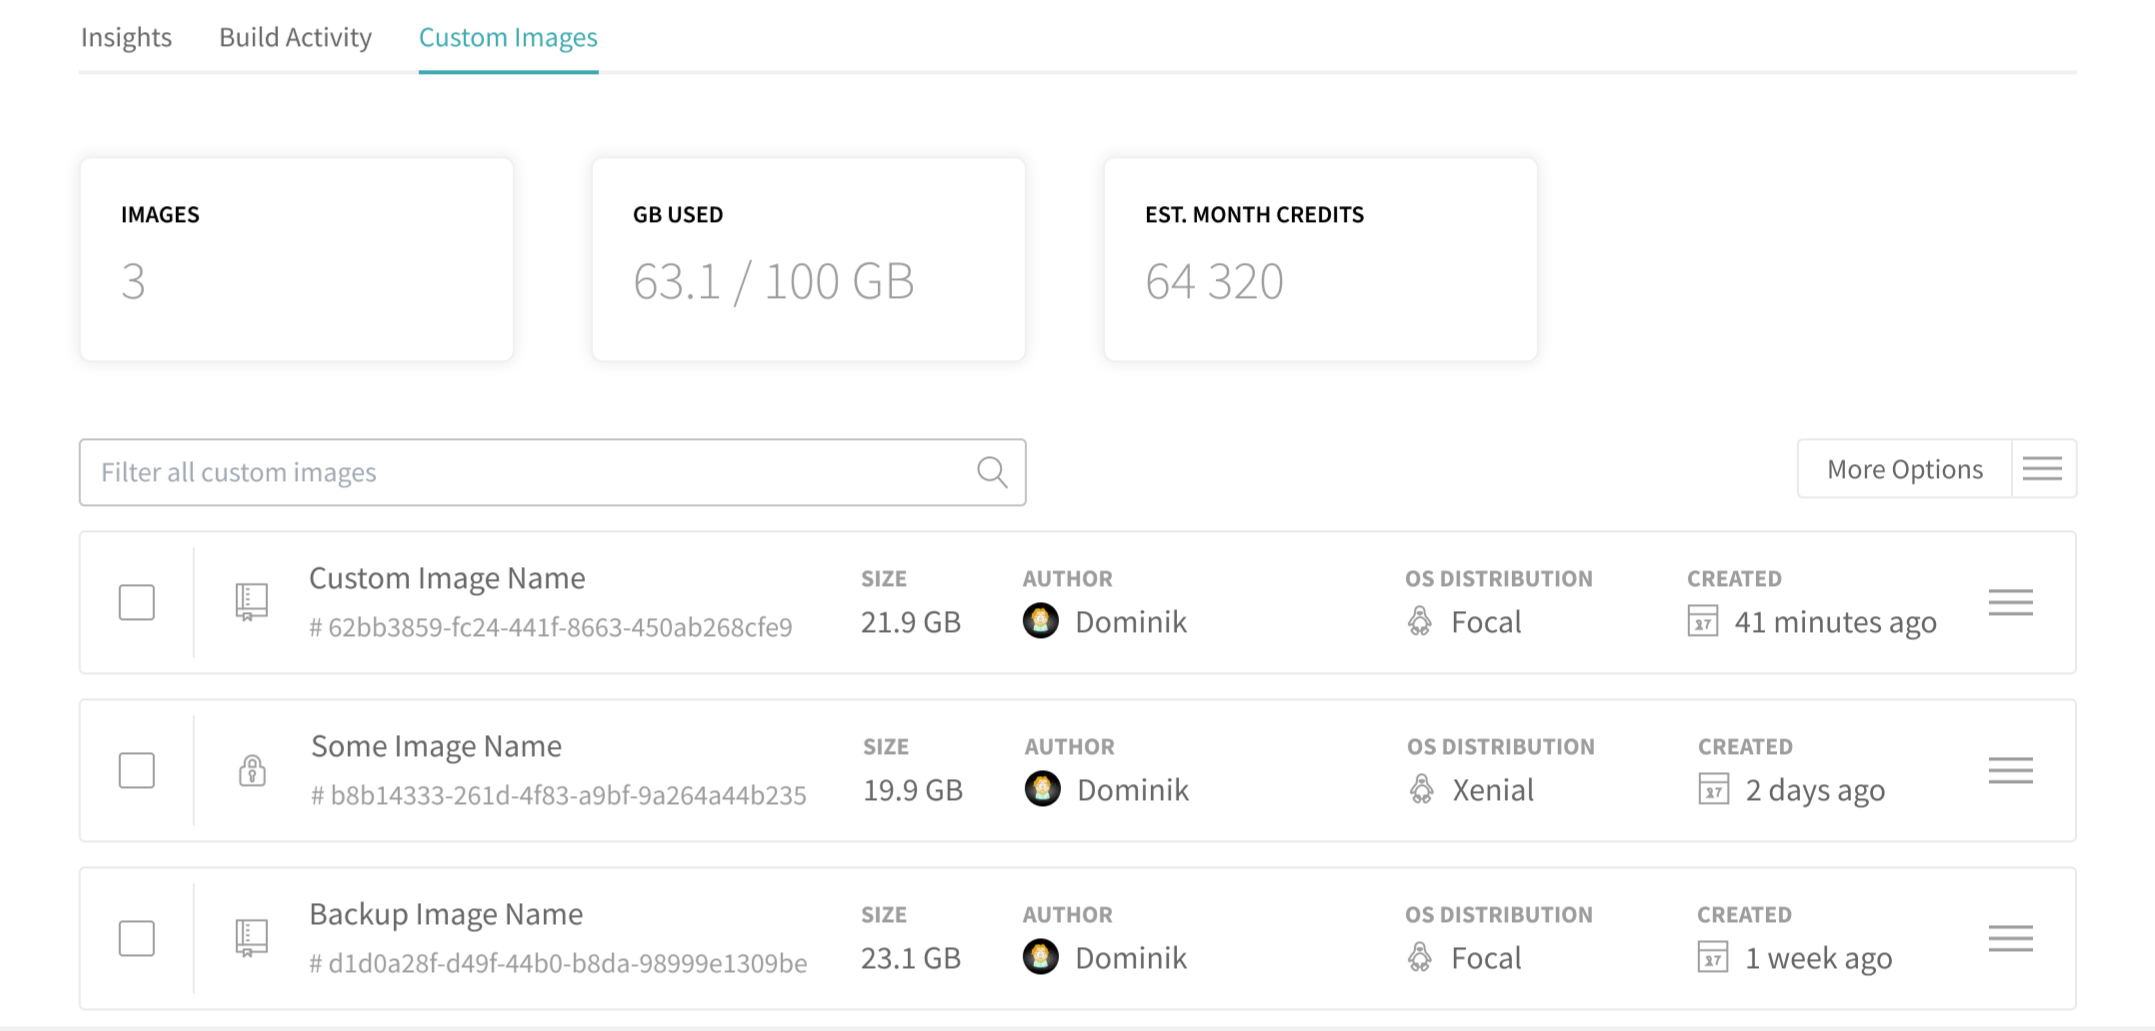
Log in to your Travis account and navigate to the Custom Images tab, where you will see a list of available custom images with details such as image identifier, image size, author, OS distribution, and date created.
At the top of the page, you can see the number of images created, the amount of GB used, and your credit balance. Also, you can filter the list of custom images by any of the details mentioned above or by the number of times a specific custom image was used since its creation.
For quick use, users can click on a Custom Image ID to copy it. Also, users can select multiple images to perform bulk actions, such as setting custom images to public or private, or deleting them.
Admin Users: More Options #
The “More Options” button and the actions menu for each custom image are available only to Travis CI users with account admin permissions.

Clicking the More options button provides users with the following choices:
- Select All - selects all available custom images.
- Set as Public - sets the custom image as public. (In the future)
- Set as Private - sets the custom image as private. (In the future)
- Delete - deletes one or more custom images.
Users can also use the action menu on the right side of the custom image to configure the options mentioned above.
Delete a Custom Image #
Only users with administrator permissions can delete any custom image from the list to manage their allowance or remove unnecessary ones. To delete a custom image, the user must select it from the list, click the action menu, and select “Delete”. Confirm the image deletion. It is possible to choose multiple custom images for deletion in a single bulk action.
Once the image is deleted, disk space charges stop.
Billing: storage and pricing #
To make informed decisions about custom image management, users can view their current storage usage, cost, and the space available before reaching the storage limit.
Storage space for custom images can be included with your plan subscription or purchased separately with Travis CI credits as an add-on.
Note: If you are part of a Shared Plan, the charge is incurred to the corresponding Travis CI plan owner.
Storage allowance #
Storage is calculated based on the custom image size and the number of existing custom images. Deleting a custom image reduces the storage space allocated for it. Creating one increases it.
Admin users can use credits to add the storage add-on to their plan. Once logged in to your Travis CI account, navigate to the Plan tab, then, under your current plan, click the Buy Add-ons button and select your desired add-ons. Here, users can choose the storage quantity that they need. For more information on Travis CI add-ons, see the Storage Add-ons page.
Exceeding the storage limits may result in additional charges, depending on the plan and storage add-on; therefore, users with paid subscriptions can purchase the storage using Travis CI credits.
Note: Credit charges may result in a negative credit balance. To avoid this, users can enable the auto-refill add-on.
Switching Plans #
If the user upgrades their plan, all add-ons attached to the plan are transferred to the new plan if the new plan has customized images available. Please contact the support team for confirmation.
Would you like to upgrade? See our different plans here.